Overview of code
The next tabs go into detail about how the code behind this project works, but here's a few diagrams that show a brief overview of each file:

• hashscan is called with a file and a signature
• gethash calculates the hashes of the file
• getfilesize is self-descriptive. This is used as some signatures specify both the filesize and the hash, although most accept a wildcard size.

• extendedmatch is called with a file and a signature
• Alternatively, logicalmatch is called with a file and a signature
• bodymatch is the underlining content-scanning file. Both extendedmatch and logicalmatch share the underlining body-based signature matching technology.
• format_sigs and sig_preprocessing make string modifications but do not do any matching by themselves
• simple_match uses hex_sig_conv as a part of its functionality of matching 'strains' of signatures
• chain_matching is used if the signature is a 'complex' signature, meaning it must be split up and its parts matched separately. location_sep_check checks if the different parts match up
sigtool
sigtool is an incredibly important tool in ClamAV, not for scanning files, but for creating signatures.
Namely, it is used to encode strings into hexadecimal signatures, and also to decode extended and logical signatures. On top of this, it is used to generate hash signatures too, including MD5 signatures, SHA1 signatures and SHA256 signatures.
Firstly, hash signatures. Python includes these hash signatures in the hashlib library, so these can be easily implemented. Here's a look at the sigtool_hash.py file:

This recreates sigtool's --md5, --sha1 and --sha256 arguments.
Now for something more interesting: hex encoding.
The sigtool --hex-dump argument works as so: it takes an input, and for each value, it calculates two output characters. It does this for each character, and joins the results to get an output hex string.
The calculation works as follows: get the character's corresponding ASCII encoding, and then calculate the first output character by performing a bitwise right shift by 4, and then a bitwise AND by 0x0f . The second character is calculated with only the bitwise AND with 0x0f .
If you didn't know: Bitwise shift is a binary operation that moves the bits in a binary number left or right by a specified number of positions, effectively multiplying or dividing the number by a power of two. Bitwise AND is a binary operation that takes two binary numbers and performs the AND operation on each corresponding pair of bits, producing a new binary number where each bit is 1 only if both corresponding bits in the input numbers are 1.

In Python, the function looks like this:

Simple, right?
Next is decoding. Before we do that, it is important to understand that in addition to the hexadecimal output that we looked at before, signatures can also contain pairs of question marks (indicating a wildcard), so we need to make sure we don't try to convert these characters to integers. Other than that, we just convert each pair of characters into a base 16 integer, and then use Python's chr() function to convert the integer into the original single character.

The i % 2 == 1 is to ensure we only iterate through every other character, as we access value pairs using hex[i] + hex[i+1] .
Next up is sigtool's --decode argument. It takes a logical or extended signature and converts it to a human readable format.
Below is output from the actual sigtool program, of an extended signature.

Here's the output from the Python implementation. It's a one-to-one match.

Extended signatures are quite simple, so the code is proportionally simple. We just split the signature into its 4 parts, convert the target type into its corresponding label, and decode the hex signature using the decodehex function we just analysed:

Logical signature are a bit more complex. These contain multiple subsignatures, so we split them and iterate through them, decoding them separately. Furthermore, logical signatures contain something called a 'sigmod' - a signature modifier. There are four of them, and we convert them to their label to their label.
• W - WIDE
• I - NOCASE
• A - ASCII
• F - FULLWORD
A logical subsignature is formatted as such:
offset:hexsig[::sigmod]

Firstly, as stated, the signature is split up. The virus name, TDB (target description block) and logical expression can all be printed as is. However, the subsignatures themselves are a bit more complex. We use the replace function to generate the text for sigmod - or set it to 'NONE' if there is no sigmod. We also get the offset, and 'preprocess' each signature before printing. We then display each subsignature. A snippet of the code for preprocessing is shown below - in brief, it converts 'wilcard blocks' indicated with {n} into usable signatures with '??'s.

Hash scanning
Antiviruses use hashes as a way to identify and detect malware on a system. When an antivirus scans a file or a piece of software, it calculates a unique hash value for that file using an algorithm. The hash value is a fixed-length string of characters that uniquely represents the contents of the file.
The antivirus then compares the calculated hash value of the file to a database of known malicious hash values. If there is a match, it means that the file has been previously identified as malware.
Hash-based detection is a fast and efficient way for antiviruses to identify and remove malware, as it does not require the antivirus to scan the entire contents of a file each time it is accessed. However, malware authors often try to evade detection by changing the contents of a file while keeping its functionality the same, which is why antivirus programs also use other detection methods - in the case of ClamAV, this would be Extended signatures and Logical signatures.
There are a few different types of hash signatures in ClamAV. There are, of course, MD5, SHA1, and SHA256. On top of this, signatures can either be of a fixed length or of a wildcard length.
A broad overview of hash scanning is as follows: firstly, calculate the MD5, SHA1 and SHA256 hashes for the file. Then, get the file's filesize. Then, load all of the signatures from the database. Iterate through the database, and if a signature matches one of the three hashes, and the filesize matches, then we can determine that the file is malicious.
The signatures are stored in the database in the format hash:filesize:virusname . Wildcard lengths are indicated with *, although it should be noted that wildcard length hashes are exceedingly rare (but not non-existent) in the official ClamAV databases.

As the signatures are of a simple, consistent format, we can easily load them into an array by iterating through each line of the database, splitting each line at the colon:

We now have an array of array, that we can iterate through and check each signature. But first we need to calculate the file's hashes. We do this using Python's hashlib library and a system using buffers, so as to avoid loading a massive file all at once. In other words, we load part of the file, and then 'update' the hash using hashlib's update() function.

We have both the hashes and the database loaded. Now we can perform the scanning itself.

The first part of he code, before the for loop, calls the code we just discussed. We needn't go over get_filesize() - it simply takes a filename as an argument, and returns the size of the file.
The for loop iterates through each item in the database. For each entry, it checks that the entry is of a valid length (the length should always be 3), and then we check if the filesize of the file matches that of the entry. If it does, the boolean filesize_match is set to True.
Then, if the entry's hash matches any one of the file's three hashes, and filesize_match is true, we can determine that in fact a match has been made.
Body-based Matching
Body-based matching is the most basic form of content (i.e., not hash) signature matching in ClamAV. It is the fundamental scanning technique that underlies both extended signature scanning and logical signature scanning. In fact, extended signature scanning itself is essentially body-based matching with the added feature of having an offset.
Here's how it works.
Firstly, a call is made to bodymatch(sig, file). The arguments are, of course, the signature and the file. The format for this kind of signature can be found in the ClamAV docs, here. Note that you can't simply scan a file with this type of signature, it is simply a technique that underlies extended scanning and logical scanning.
file is not a file object, but a string of the contents of a file. sig in this instance would refer to a signature such as 4141{-2}4242 .

As can be seen, we immediately reassign sig, to the result of the function call get_processed_sig(sig). Let's look at that function:

Now, to understand the significance of these functions, we must look at a very important concept.
ClamAV's body matching functionality has a feature that I term separators. These are values such as '*', or '{2-12}', or '{8-}'.
Our example signature from earlier was: 4141{-2}4242
What this signature says is, match two bytes of the value 41, match any 2 or less bytes (i.e., these could be any 2 or less bytes - wildcard), then match two bytes of the value 42.
How these are actually handled, is that the signature is split into subsignatures. Each subsignature is then matched to the file, and the resulting 'locations' (offsets) of where they matched are compared to see if they correspond to the separators.
In effect, then, there are two different types of signatures: 'Simple signatures', which do not have any separators, and are simply matched by seeing if the signature is represented in the file, and 'Complex signatures', which consist of multiple subsignatures, each with their separators that declare how 'far apart' that subsignature must be from the next for a match to occur.
Valid separators will be in one of the following formats:
• *
• {n-}
• {-n}
• {n-m}
You'll notice that {n} isn't included in this list. It is handled instead by replacing {n} with n instances of '??'. So '{3}' is simply replaced with '??????'. As such, {n} isn't a separator, and simple signatures can include {n}.
It's also important to note that the end user (signature writers) needn't be familiar with the distinction between simple and complex signatures, as it is an 'invisible' system that is only internally used and referenced.
Ok, back to bodymatch now. The first part of bodymatch (line 20-24 in the screenshot) assigns a boolean, so we can keep track of whether we're dealing with a simple signature or a complex signature.
Then, if it is a simple signature, we just call simple_match, and if it returns an array of a length greater than 0, this means that a match occured somewhere in the file. Let's look at simple_match:

The actually matching algorithm itself is not too complex. In essence, it is a naive string searching algorithm with support for wildcards, and of course, matches two characters in the 'needle' for every one character in the 'haystack', as the 'needle' consists of hexadecimal encoding.
The top function, simple_match(), is the aforementioned string searching algorithm. The comparison is not made by 'if a == b' as would normally be the case in a Python string searching algorithm, but instead by the function individual_char_match().
individual_char_match first checks if the signature character pair is a wildcard pair ('??'). If so, then it returns True, always. Then, it also does 2 other wildcard checks - one to check if the wildcard value is the first character, and then another for the second character. As per the ClamAV docs:
• a? - Match a high nibble (the four high bits).
• ?a - Match a low nibble (the four low bits).
We use bitwise AND to achieve this, masking out the four high bits and low bits respectively.If neither of the characters are wildcard, then we just decode the hex and do a regular string comparison to check for equality.
These functions are used to actually perform the signature matching itself. simple_match() returns an array of indexes where the signature matched the content of the file.
Alright, back to bodymatch again. simple_match is called on simple signatures, but how do we handle complex signatures?
We split the signature up into the location the subsignature matched at, its separator, and the length of each subsignature, storing this all in an array called allresults. We then call the function 'initiate_match' on this array. Let's look at initiate_match:

Essentially, we have a recursive algorithm that returns how many (if any) possible paths there are from any of the first locations that matched to any of the last locations that matched, and we check the separators at each stage. We check if each subsignature is a valid distance to the next (in accordance with the separators) by calling the function location_sep_check:

This is a simple function that returns True if the difference between the first number and second number corresponds to the separator, and False otherwise.
Extended signatures
Hash detection will fail to detect new malware variants with different hashes. This is where extended and logical signature scanning is powerful.
The code for extended signature scanning is very simple, as extended signatures largely just use the body-based matching format covered in the previous tutorial, but there's also the addition of an offset, which can be either a wildcard or an integer value. Let's look at the code below:

This is all the code.
Firstly, we split up the signature into its constituent parts: Virus name, features (which we ignore), offset and the signature itself. Then, we conduct a body match on the file and the signature, the results of which we store in scan_res.
To recall: bodymatch returns a list of indexes where a match occurred, if any.
If there is an integer offset, we simply check if the integer is one of the indexes where the match occurred, and if so, then we can determine the file is malicious.
On the other hand, if the offset is wildcard, then if there are any indexes at all then a match has occurred and the file is malicious.
Logical Signature Scanning
Logical signatures are a bit more complex than extended signature scanning.
In logical scanning, there are multiple subsignatures, which must match a logical expression in order for a match to occur. An example logical expression would be (0&1) , with the meaning that both subsignatures 0 and 1 must be true (matched) for the file to be deemed malicious.

Firstly, we split the signature up into its parts. We then do some sort of converting with both the subsigs and the logical expression. Also, we match all of the subsigs with the file. After, we do yet more converting of the logical expression before 'executing' it, and we return the results of this execution.
Let's look at convert_all_subsigs(logexp, subsigs) first:

All that really happens here, is we split each individual subsignature into its constituent parts.
Now let's look at match_all_subsigs(subsigs, file):

The name of the function is quite descriptive. We match each subsig with a call to bodymatch, and then append the result of the scan to the subsig. We do this process for every subsig.
split_log_exp(logexp) is a bit more complicated in terms of its code, but its function is not too difficult to understand.

Logical expressions consist of three types of characters. The two most important ones are number characters, and structure characters. There's also comparator characters, but these are extraordinarily rarely used in actual databases, whereas the other two are in practically every signature. Number characters are used to reference subsigs. For example, in the signature (0&1&2) , the numbers here reference subsigs 0, 1 and 2. The other characters (the brackets and the ampersands) are structural - they connect the subsignatures, in a sense. Together they form the logical expression.
split_logexp just takes a logical expression in the form of a string, and returns it as an array of number characters and structural characters (as well as comparator characters). The purpose of this is so that we can replace the number characters with the actual result of the corresponding subsignature's scan results, so that we can execute the logical expression. We do this using convert_simple_le:

In addition to the doing the aforementioned conversion, we also replace the ampersand and pipe symbols with their representation in Python, 'and' and 'or'.
After this, we join the logical expression array back up into a string and we 'execute' (more accurately, evaluate) the logical expression:
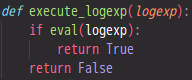
That's all! If the subsignature results match the logical expression, then we return True, indicating that the file is malicious, at least according to the signature.
Testing
We need a way to test if our code is return results that match that of the actual ClamAV build - in other words, to see if the code actually works, as any result other than the official ClamAV result is a failure. How do we test that?
A broad overview of the process is as follows: We have a built-in set of files and corresponding signatures. We then iterate through each file and signature and perform a scan with the pairs. We perform this scan twice - one with the official ClamAV application, and one with our own Python code.
We compare the results between the two, and if they match, then this means that our code is working as expected.
Below you can see how the code for getting the ClamAV scan results works:

First we call get_clamav_result with a signature and a file. The signature is written to a database (in write mode, not append mode, so it is the only signature in the entire database. The file is written to an actual file. We then execute a command that runs ClamAV quietly (no terminal output) on our file, and outputs the results of the scan to scan_output.txt. Unfortunately the scan output is not a simple true/false statement we can read - we need to interpret it using read_result. More on that in a second.
As a result of writing all these files for ClamAV to use, we now have clutter we need to clean up. clean_test_files iterates through each of the files and deletes them.
To read the result of a scan, we check the scan output file for the presence of the string 'Infected files: 0'. If the string is not present, find will return -1. This means that ClamAV determined the file was malicious. Resultantly, we return True. Otherwise, 'Infected files: 0' was in fact found, so there is no infection. We return False.

We have an array of files and a corresponding array of signatures (omitted here to save space). We then iterate through each one, performing each scan, and comparing the results. If even a single match fails, then overall_result is set to False - i.e., each match must pass for the test to pass.
Roadmap for what's next
While this project does indeed function as a lightweight replacement for ClamAV's scanning functionality, it is missing some functionality from the original program. The missing functionality is extraordinarily niche and uncommon in the official ClamAV database, but nonetheless, to comprehensively cover all of the functionality of scanning, the following must be implemented:
• Support for sigmod (signature modifiers). To implement this would require modifications to simple_match.py, i.e. for case insensitivity it could match either uppercase or lowercase versions of the character. Currently, sigmods are just ignored by the program.
• Support for comparators. This would require writing a more comprehensive way to interpret logical expressions, namely execute_logexp in logicalmatch.py would need to be completely changed. Currently, if a signature contains comparators (quite rare) then the program exits with a message informing the user why.
• Phishing detection support. Currently this is outside of the scope of the project. The first and most importantly would be to create a URL extractor.
• PE support. Would require software that can 'unpack' PE files.